Peel Region Seller Prep List: Cut Stress and Stay on Track (2026)

The Peel Region seller checklist is a step-by-step plan Mississauga homeowners use to prepare a property, assemble disclosures, set a winning list strategy, manage showings, evaluate offers, and close smoothly. It reduces time on market, increases buyer confidence, and supports stronger negotiations when every day and detail matter.
By Malika Mehrotra | Last updated: July 6, 2026
Above the fold: your map and quick links
Use this Peel Region seller checklist to move from “thinking of selling” to “keys handed over” with clarity. You’ll see the seven core phases, a comparison of listing approaches, pro tips for staging and negotiations, and vetted resources, all tailored for Mississauga homeowners who want results without overwhelm.
Here’s what you’ll find at a glance. Skim it now, come back to each step as you move forward.
- What this checklist is and how it keeps you on track
- Why it matters in Mississauga’s fast-moving micro-markets
- How the process works: 7 clear phases from prep to close
- Listing approach comparison: FSBO vs. full-service vs. hybrid
- Best practices that consistently improve outcomes
- Tools and resources you can actually use today
- Local examples, buying-guide insights, and a concise FAQ

What is the Peel Region seller checklist?
A Peel Region seller checklist is a practical, sequenced guide for Mississauga, Brampton, and Caledon homeowners to prepare, market, show, negotiate, and close a home sale. It replaces guesswork with clear actions, timelines, and quality standards so you reduce friction, attract qualified buyers, and protect your bottom line.
At Malika Homes, we organize the work into seven phases that reflect how real offers come together in our market. Each phase has 3–8 critical actions. Most sellers complete the full path in 4–8 weeks, depending on repairs, staging scope, and buyer activity.
- Phase 1: Strategy and data (goal-setting, market fit, timing)
- Phase 2: Property readiness (repairs, paint, staging plan)
- Phase 3: Marketing launch (media, MLS, social, showing windows)
- Phase 4: Showings and feedback (optimize in first 72 hours)
- Phase 5: Offers and negotiation (terms, conditions, closes)
- Phase 6: Firm-up and due diligence (docs, buyer visits)
- Phase 7: Closing logistics (keys, utilities, move-out coordination)
Because Mississauga sub-markets shift by neighborhood, a templated list isn’t enough. We tailor each step using analytics, staging guidance, and our Certified Negotiation Expert approach so you’re not leaving value on the table.
Why this checklist matters in Mississauga
In Mississauga, listing momentum is front-loaded: the first 72 hours often deliver the most impressions, showing requests, and buyer questions. A disciplined checklist ensures your home is show-ready, disclosures are complete, and your offer strategy is set before launch—so you convert attention into strong, clean deals.
Here’s the thing: buyers decide in seconds whether to book a showing. Your photos, description, and even porch lights shape that decision. A checklist shores up weak links before they cost you traffic, leverage, or days on market.
- Momentum window: Expect a spike in interest within days 1–3. Prepare for 8–12 showings if the launch is dialed in, then stabilize.
- Buyer confidence: Pre-list inspections, organized binders, and consistent staging reduce uncertainty and renegotiation risk.
- Negotiation leverage: Clean terms, flexible closing windows, and demonstrated upkeep improve offer quality and speed.
- Photos and flow: 20–30 professional images plus a 2–3 minute video tour help buyers pre-qualify themselves.
Local considerations for Mississauga
- Plan showing logistics around commuter corridors near Derry Rd At Dixie Rd to keep 30–60 minute viewing blocks efficient and low-stress.
- Seasonal timing matters: fresh mulch, window cleaning, and dusk photos add warmth in spring and fall when daylight shifts fast.
- For weekend traffic near Dixie Rd At Courtneypark Dr, set clear open-house windows and sign riders to manage flow and safety.
We’ve found that sellers who front-load prep often save 5–10 hours of scramble later. That time goes back into evaluating terms and protecting net proceeds.
How the selling process works: 7 clear phases
The selling process flows through seven phases: strategy, readiness, launch, showings, offers, firm-up, and closing. Each has a short checklist, owner and agent tasks, and a target timeline. Nail the first four phases and you’ll amplify showings, lower friction, and improve your negotiation outcomes.
Phase 1 — Strategy and data (1–3 days)
- Clarify goals: move date, lease-back needs, non-negotiables.
- Study micro-market comps and buyer profiles by property type.
- Decide list window and showing strategy (e.g., 2–4 day offer window).
- Read our Ontario selling process guide to align on paperwork.
Phase 2 — Property readiness (5–10 days)
- Light repairs: paint touch-ups, caulking, squeaks, bulb swaps, door hardware alignment.
- Staging plan: edit 25–40% of items, add greenery, balance light and sightlines.
- Safety and smell: service HVAC filters; neutral, clean scent (no heavy perfumes).
- Avoid common pitfalls from our selling mistakes guide.
Phase 3 — Marketing launch (2–4 days)
- Pro photography: 20–30 finished images, golden-hour exteriors, detail vignettes.
- Media mix: video tour (2–3 minutes), floor plan, feature sheet PDF.
- MLS syndication and social campaign; set 15–30 minute showing slots.
- Preview buyer FAQs from our Mississauga buyer guide.
Phase 4 — Showings and feedback (3–7 days)
- Daily reset routine: lights on, blinds set, bins hidden, porch swept.
- Track questions and repeat friction points; update description if needed.
- Weekend open house: set entry flow, shoe mats, and route arrows for 10–20 parties.
Phase 5 — Offers and negotiation (1–3 days)
- Evaluate beyond price: deposit strength, conditions, close date, inclusions.
- Use a clear counteroffer framework (one ask per counter to speed agreement).
- Our Certified Negotiation Expert process prioritizes risk, then net, then timeline.
Phase 6 — Firm-up and due diligence (3–10 days)
- Organize docs: utility averages, upgrades list, manuals, warranties, survey (if any).
- Buyer visits: 1–2 scheduled measurements/contractor visits with agent oversight.
- Coordinate with your lawyer and lender for smooth discharge and statement prep.
Phase 7 — Closing logistics (1–2 days pre-close)
- Final clean: vacuum lines visible, appliances spotless, windows streak-free.
- Keys and remotes: label 2–3 sets; include mailbox and community fobs.
- Utilities: photo meter readings; schedule shutoff/transfer for closing day +1.
Want a deeper dive into buyer behavior? Our Mississauga home buying checklist shows how buyers decide and what convinces them to act fast.
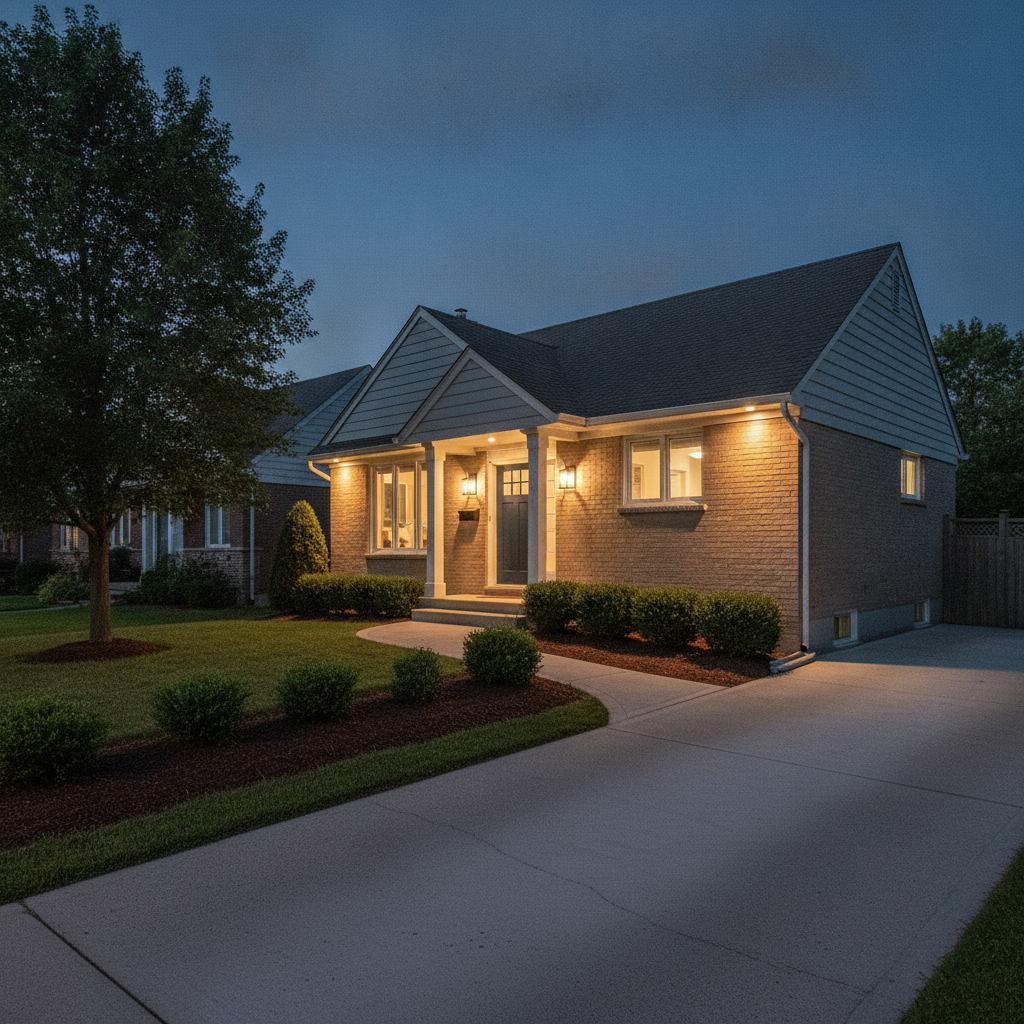
Types of listing approaches compared
Sellers typically choose among three approaches: do-it-yourself (FSBO), full-service representation, or a hybrid. Use the comparison below to weigh control, time demand, marketing horsepower, risk, and negotiation strength. Most Mississauga sellers pick full-service to maximize exposure and minimize friction.
| Approach | Best for | Pros | Tradeoffs | Time required | Negotiation strength |
|---|---|---|---|---|---|
| FSBO (Do-It-Yourself) | Owners with marketing, legal, and showing capacity | Direct control, flexible schedule | Lower visibility, higher legal/admin workload | High (15–25 hours/week) | Variable; depends on buyer’s agent dynamics |
| Full-Service Representation | Busy sellers prioritizing exposure and risk mitigation | Pro marketing, staging guidance, negotiation discipline | Less direct control over day-to-day tasks | Low–Medium (3–6 hours/week) | High; coordinated strategy and leverage |
| Hybrid (Limited Service) | Experienced sellers wanting MLS plus some support | Mix of DIY and pro elements | Gaps can appear in negotiation and due diligence | Medium (6–12 hours/week) | Moderate; depends on vendor quality |
If you’re exploring the DIY route, this Ontario FSBO overview offers background on responsibilities. For marketing fundamentals, see this home marketing guide. For MLS distribution basics, this MLS guide provides a plain-English refresher.
Seller best practices that move the needle
Small, consistent actions compound: edit 25–40% of belongings, neutralize paint and scent, light every room, and publish a complete feature set on day one. Pair that with responsive showing windows and disciplined counters to protect momentum and your net proceeds.
Pre-list polish (2–5 days)
- Fix the top 10 visual distractions: scuffs, grout, wobbly handles, and gaps.
- Declutter: remove 1–2 bulky items per room to widen pathways and sightlines.
- Lighting: warm bulbs at 2700–3000K; aim for 2–3 light sources in living spaces.
- Photos: schedule at least 48 hours after cleaning and staging are locked.
Launch discipline (first 72 hours)
- Answer showing requests within 10–30 minutes to keep buyers engaged.
- Publish a detailed features list (upgrades, systems, inclusions) on day one.
- Set a clear offer plan: either “review anytime” or a defined review window.
Negotiation rhythm
- Sequence counters with one focused ask each round to speed agreement.
- Weigh deposits, conditions, and close dates as heavily as headline price.
- Document everything; clean paper trails reduce post-offer friction.
Want a broad view of provincial dynamics? Our Ontario real estate guide pairs macro trends with tactical choices you can make this week.
Tools and resources for Peel Region sellers
Use practical tools, not theory. Lean on a pre-list checklist, media schedule, and showing scripts. Supplement with calculators, buyer guides, and marketing refreshers so you make decisions fast and back them up with data when negotiating.
- Pre-list weekly planner: repairs, staging, media, and launch dates in one view.
- Buyer FAQ sheet: utilities, upgrades, and neighborhood highlights.
- Media checklist: 20–30 photos, 1 floor plan, and a 2–3 minute tour.
- Read our Ontario home buying guide to anticipate buyer questions.
- Explore pitfalls to avoid in our seller mistakes guide.
- For Mississauga shoppers, pair this with our buyer checklist to align marketing with buyer behavior.
For general background on marketing and listing mechanics, see the Ontario marketing overview and this plain-English MLS guide. If you’re evaluating DIY duties, review an FSBO responsibility list so nothing slips through the cracks.
Free planning session: If you want a customized Peel Region seller checklist mapped to your dates and goals, book a quick consult. We’ll align the 7 phases to your timeline and flag gaps before launch.
Case studies and local examples
Real outcomes come from small, disciplined moves. These mini case studies show how pre-list polish, media discipline, and offer strategy translate into stronger terms. Timelines vary, but the principles repeat: preparation, clarity, and swift communication win.
Mississauga detached near commuter routes
- Prep focus: lighting updates, paint touch-ups, and garden edging in 6 days.
- Media: 28 photos, dusk exterior, and a 2-minute tour with floor plan.
- Results: 18 showings in 4 days; offer selected for strong deposit and flexible close.
Brampton townhouse with first-time buyer appeal
- Prep focus: declutter 30%, neutral rug swaps, and kitchen hardware refresh.
- Media: 22 photos, layout diagram, and highlight list of recent upgrades.
- Results: 12 showings; accepted offer with short condition window.
Oakville condo targeting downsizers
- Prep focus: minimalist staging, balcony seating vignette, and storage solutions.
- Media: 20 photos emphasizing natural light and amenities.
- Results: 9 showings; best offer chosen for clean terms and convenient close.
If you’re cross-shopping communities, we also produce neighborhood buyer content (see our Oakville guidance referenced in our regional buyer pieces) to synchronize staging choices with likely buyer questions.
Buying-guide style: choosing your listing approach
Choose a listing approach by scoring five factors: time available, risk tolerance, negotiation confidence, marketing depth, and paperwork comfort. If three or more factors lean “pro help,” full-service typically delivers higher exposure, cleaner terms, and better protection.
- Time available: Can you dedicate 15–25 hours/week for 2–4 weeks?
- Risk tolerance: Comfortable managing disclosures, conditions, and buyer due diligence?
- Negotiation confidence: Ready to counter in 20–60 minutes with data-backed asks?
- Marketing depth: Can you source pro photography, floor plans, and copy that converts?
- Paperwork comfort: Are you organized enough to track amendments and timelines?
Not sure where you land? Our provincial guide and buyer perspective primer highlight how listing choices shape buyer interest and offer structure.
Frequently asked questions: Peel Region seller checklist
These are the quick answers Mississauga homeowners ask before listing. Use them to avoid avoidable delays, align expectations, and keep momentum.
How long does it take to get a home listing-ready?
Most homes can be photo-ready in 5–10 days with a focused plan: light repairs, paint touch-ups, deep clean, and simple staging edits. Larger projects or contractor schedules can extend that to 2–3 weeks. We sequence tasks so media day lands right after cleaning.
What documents should I prepare before launch?
Gather utility averages, recent upgrades, warranties, appliance manuals, a survey if available, and any permits. Having these ready reduces back-and-forth during offer review and helps buyers move quickly on clean terms.
How many photos should my listing have?
Aim for 20–30 photos that tell a clear story: exteriors, main living areas, kitchen, primary suite, key baths, storage, outdoor space, and any unique features. Include a floor plan and a 2–3 minute walkthrough video to improve buyer self-qualification.
When should I expect the most showings?
The first 72 hours usually bring the most online impressions and showing requests. That’s why we finalize staging, cleaning, and a complete feature list before publishing, and we respond to inquiries within minutes to keep interest high.
Key takeaways
Success is simple, not easy. Prep thoroughly, launch decisively, respond quickly, and negotiate with discipline. Use checklists, buyer insights, and market-tailored strategies to protect momentum and net proceeds.
- Front-load repairs, edits, and cleaning to protect day-one momentum.
- Publish a complete feature set and media package at launch.
- Use short, decisive counters that focus on one priority at a time.
- Keep documents organized so firm-up and closing stay smooth.
Conclusion and next steps
A strong Peel Region seller checklist turns a complex process into seven manageable phases. If you want a plan personalized to your dates and goals, we’ll map the tasks, vendor coordination, and offer strategy so you launch with confidence and finish strong.
- Use the seven phases as your weekly roadmap.
- Schedule media only after cleaning and staging are complete.
- Decide your negotiation posture in advance to move quickly.
- Questions? We’re here to help you launch decisively in Mississauga.
Ready for a custom plan? We’ll tailor the Peel Region seller checklist to your home and timeline so you can list with confidence.
Related reading to go deeper
Explore buyer mindsets and provincial context to sharpen your listing strategy. A clearer view of how buyers decide helps you focus on prep that actually moves offers higher and faster.
Pair this guide with our regional perspectives for a full 360° view: the Mississauga buyer checklist for local behavior, the Ontario market guide for macro context, and our seller mistakes guide to dodge common traps. If you’re comparing cities, our buyer pieces reference Oakville guidance you can adapt.
Tags
Have questions about Ontario real estate?
Book an appointment with Malika Mehrotra to discuss your buying or selling goals.
Book Appointment